A visible timer for presentation keeps lessons calm, focused, and on schedule. Instead of fielding “How much time is left?”, you can teach while the clock quietly does the pacing. This guide shares nine teacher-tested ways to use a timer in class, plus a 60-second setup for PowerPoint so you can start today.
Many teachers use a simple timer for presentation in lessons to manage transitions, group work, and independent tasks.Helpful: If you want a dedicated page for schools, see our Classroom Timer. If you’d like to compare options, here’s our Best PowerPoint Timer Add-ins review.
🇨🇳 如果你在中国教学,并且希望获得适用于 PowerPoint / PPT 的中文计时器插件, 可以访问我们的 UbiTimer 中文页面 获取详细说明和 EDU 免费授权信息。
Table of Contents
Why a timer helps learning
9 classroom ideas with timings
Countdown vs stopwatch (when to use each)
Set up a timer for presentation in 60 seconds
Tips, accessibility, and pitfalls
FAQs
1) Why a timer helps learning
Predictable pacing: time-boxed tasks reduce anxiety and drift.
Fewer interruptions: the clock answers “how long?” for you.
Better transitions: visible countdowns lower noise and switching costs.
Self-management: students learn to plan within the time given.
For official guidance, see Microsoft AppSource (verified Office add-ins) and PowerPoint Help & Training.
2) 9 classroom ideas (with suggested timings)
Starters / bell work (3–5 mins)
Kick-off focus tasks while you take the register. A timer for presentation sets the tone from minute one.Think–Pair–Share (2–3–2 mins)
Use three short windows: thinking, partner talk, share-outs. Reset the timer between phases.Station rotations (5–10 mins)
Keep movement orderly with a clear countdown. Flash a “rotate” cue at zero.Mini-quizzes & retrieval practice (4–7 mins)
Time-box low-stakes quizzes. Pause if most students need 30–60 seconds extra.Silent reading or worked example (5–8 mins)
A quiet, visible clock reduces “are we done yet?” interruptions.Group tasks & projects (10–15 mins)
Mid-task announcements at “5 minutes left” reduce last-minute rush.Debates & speeches (1–3 mins per speaker)
Switch to stopwatch for strict speaking windows.Brain breaks (1–2 mins)
Short movement breaks with a friendly countdown restore focus.Exit tickets & packing up (2–3 mins)
End with calm routines; the timer for presentation keeps the buffer tidy.
3) Countdown vs Stopwatch — when to use which
| Scenario | Use | Why |
|---|---|---|
| Starters, rotations, quizzes | Countdown | Everyone can see how much remains. |
| Speeches, demos, Q&A | Stopwatch | Track elapsed time, not a fixed end. |
| Practice rounds | Both | Stopwatch for rehearsal; countdown for the live run. |
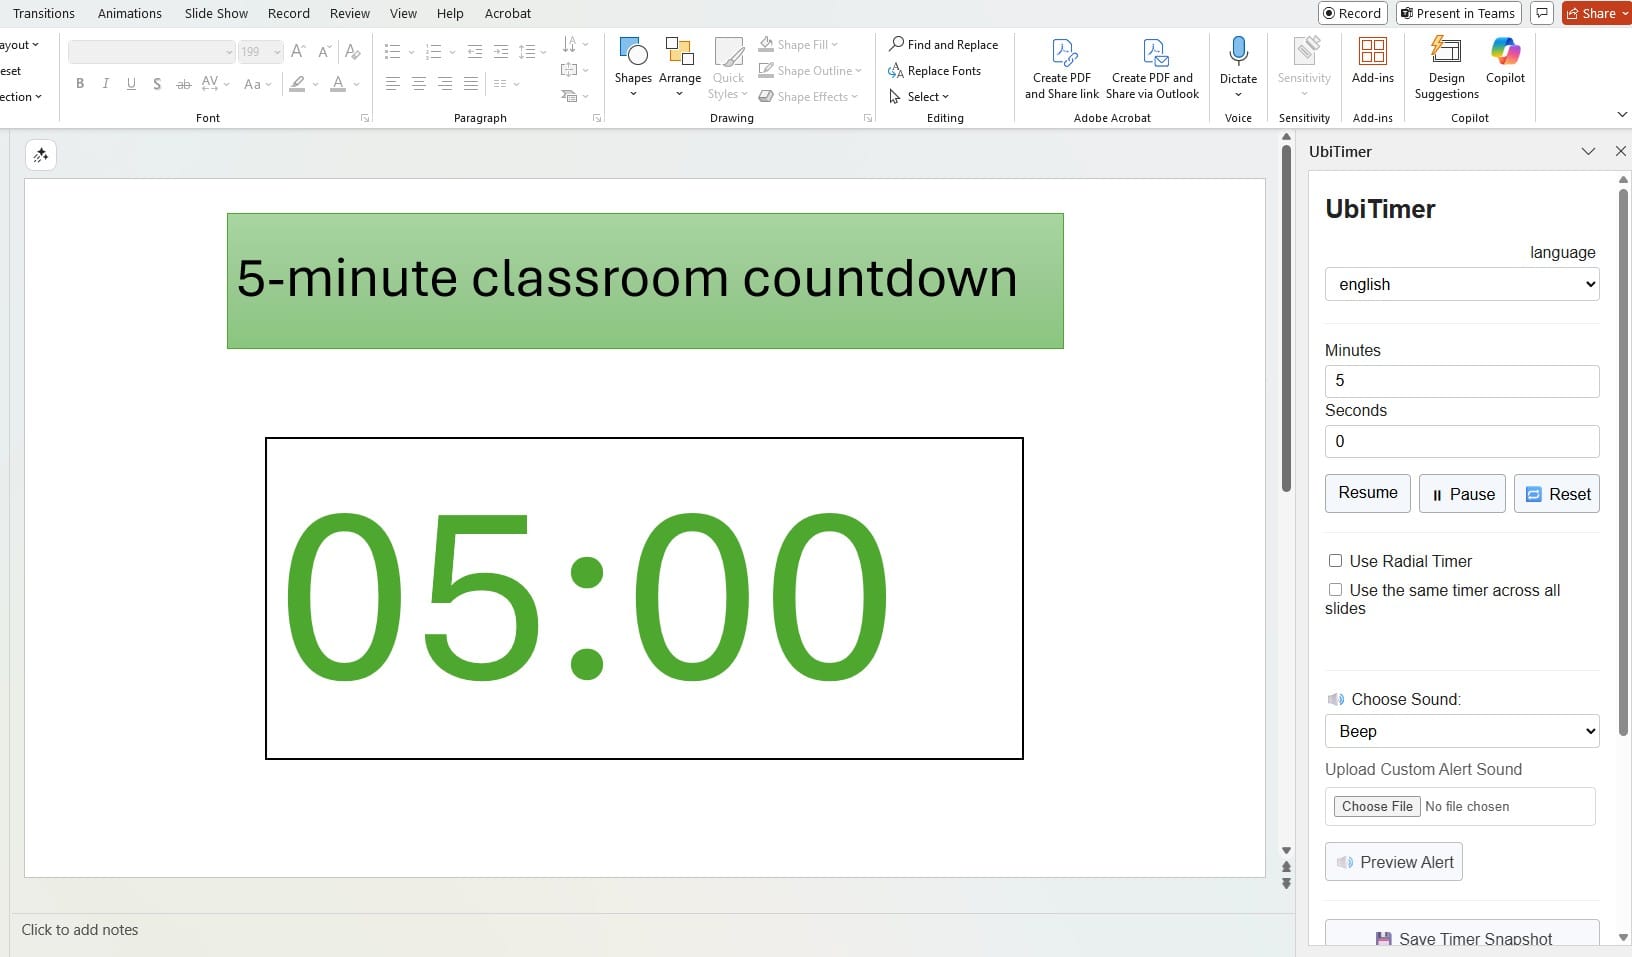
4) Set up a timer in PowerPoint (60 seconds)
Install UbiTimer (PowerPoint add-in) — see Pricing for Free EDU.
Open your deck → click UbiTimer on the ribbon to open the task pane.
Choose Countdown (e.g., 5:00) or Stopwatch, set style (font/size/colour).
Click Insert Timer to place it on the slide.
Start Slide Show → Start / Pause / Reset as needed.
Screenshot
If you teach with slides, a PowerPoint classroom timer can help keep your lesson on track during starters, plenaries, and timed tasks. Teachers who present with slides often prefer a countdown timer in PowerPoint because it keeps the timing visible during the lesson.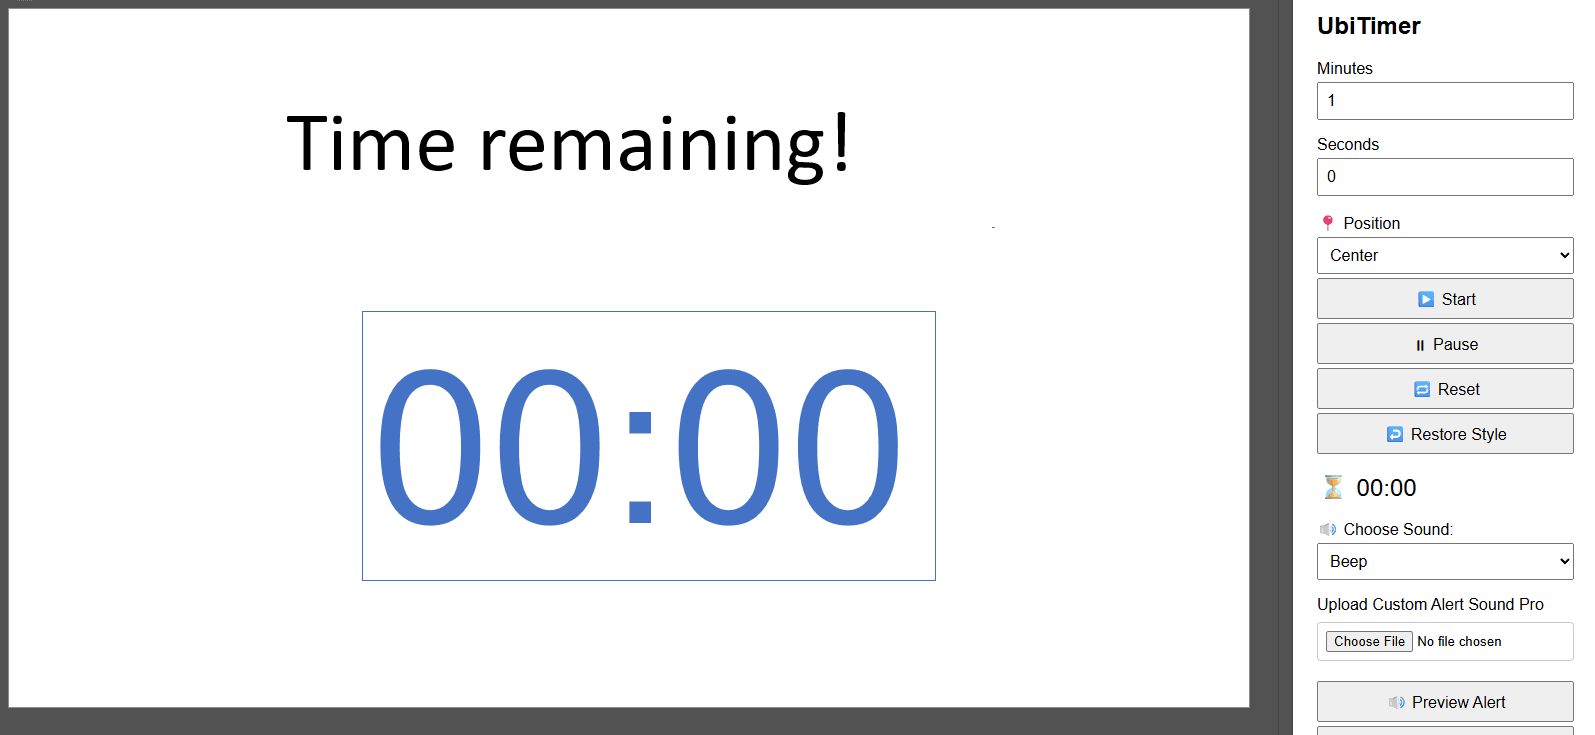
5) Tips, accessibility, and pitfalls
Tips
Announce purpose: “You have 4 minutes for Q1–Q3.”
Use common durations: 3, 5, 10 mins = easy routines.
Narrate checkpoints: “2 minutes left.”
Accessibility
High contrast, large numerals, and consistent placement.
Avoid busy backgrounds behind the timer.
If recording, ensure the timer is legible on smaller screens.
Pitfalls to avoid
Overuse: hide the timer when it’s not needed.
Tiny timers: if students can’t read it, it won’t help.
Network dependence: prefer insertable, offline-capable timers over web tabs.
6) FAQs
Q: Does a timer distract students?
A: Used sparingly and placed cleanly, a timer for presentation lowers noise and uncertainty rather than distracting.
Q: Can I keep the timer across multiple slides?
A: Yes—either duplicate the slide or insert a new timer on each slide for consistent behaviour.
Q: Will it work without Wi-Fi?
A: With an insertable add-in like UbiTimer, yes—after installation it works offline in Slide Show.
Q: Can I match my school fonts/colours?
A: Yes—set font, size, and colour once, then duplicate the slide to keep styling.
Make Your Timer Work Harder
A visible timer for presentation is most effective when routines are consistent. Tell students the goal, the time window, and what happens at zero (“pens down, eyes front”). Use familiar durations—3, 5, or 10 minutes—so classes learn the rhythm, and narrate checkpoints: “two minutes left.” Keep contrast high and position the timer where it doesn’t cover objectives or worked examples. If many students need more time, pause or add 30–60 seconds to keep trust high.
For Q&A or demos, switch to a stopwatch mode to track elapsed time. This still functions as a timer for presentation but removes the pressure of a fixed end. Duplicate your best-looking slide to keep styling consistent across activities.
Conclusion & CTA
A visible timer for presentation makes pacing predictable, transitions smoother, and lessons calmer. For teachers, the simplest approach is an insertable timer that runs inside PowerPoint—no app switching, no distractions.
👉 Try a classroom-friendly timer now: Get UbiTimer (Free EDU)
Need more? See our Classroom Timer page or the FAQ.
Timing Templates You Can Use Today
Consistent routines make a timer for presentation feel supportive rather than stressful. Try these plug-and-play templates and adjust by subject or group.
- Starter (4 minutes): 1 min read prompt · 3 min respond. At zero: pens down, eyes front.
- Think–Pair–Share (7 minutes): 2 think · 3 pair · 2 share. Pause between phases to reset attention.
- Station rotation (24 minutes): 3 stations × 8 min each. Give a 60-second warning before moving.
- Mini-quiz (6 minutes): 5 min answer · 1 min self-check. Add 30–60 seconds if most need it.
- Q&A (5 minutes): Use stopwatch; call time on long answers and invite one follow-up.
Teacher Scripts That Reduce Noise
Clear, repeatable language helps students anticipate what happens at zero. Borrow any of these lines:
- “You have three minutes for questions 1–3. I’ll call ‘two minutes’ and ‘thirty seconds.’”
- “At zero: pens down, eyes front. If you’re mid-sentence, finish that sentence only.”
- “Need more time? Show a thumbs-sideways; I’ll add thirty seconds if most of us need it.”
- “Rotate when the timer finishes. Take your work with you; leave the table tidy.”
Common Pitfalls & Quick Fixes
- Timer too small → Increase font/size and place it top-right or bottom-right away from objectives.
- Students rush the last minute → Give a calm checkpoint: “One minute left—finish the line you’re on.”
- Transitions get loud → Build a 10-second “wrap-up” buffer before zero; narrate expectations.
- Tech hiccups on a new PC → Keep one slide as a known-good template you can duplicate in seconds.
Inclusion & Accessibility
Make your timing visible and fair for every learner. Use high-contrast colours, large numerals, and consistent placement. Avoid busy backgrounds behind the numbers, and read out checkpoints for students who benefit from auditory cues. If you share slides after class, include the timing notes so learners can practise at home.
Next Steps
Ready to put this into practice? Install the add-in, duplicate a “timing slide” in each lesson, and start small—one routine at a time. With a reliable timer for presentation, your pacing becomes predictable, transitions calmer, and learning time maximised.
